Reliable weld seam inspection in the production process
High-speed cameras are the researchers' favourites when testing welding processes. However, their application is not practicable for the production process for several reasons.
With 500 images per second, the course of a welding process can be documented very nicely. Observation of the weld pool and observation of the plasma glow are a great help in understanding the process. Even the search for welding defects such as holes, cracks and pores is not helpful. Because there are no holes and cracks in the molten pool. These only form during the solidification phase in the cooling material. The cooling behaviour during the solidification phase can only be recorded to a limited extent. Only defects on the surface are visible. The welding depth or the connection of the upper material layer to the lower material layer cannot be detected by pure surface inspection. This important function cannot be achieved in this way.
In addition, the enormous amount of data generated by so many images cannot be evaluated quickly enough during a production process to support production control. This means that high-speed cameras are very well suited for scientific research, but for production monitoring a different solution must be chosen.
For a fast scheduled series production, a method is needed that can keep up with the process cycle and also immediately provide the quality information for further processing at the end of the processing of a component. For this purpose, the system must generate the most reliable information possible with as little data as possible and also provide the eminently important information about the connection.

A single image per weld seam is all it takes for reliable and fast quality assessment

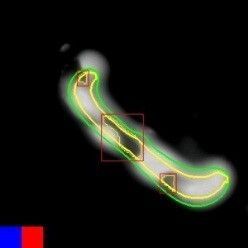
With the seelectorICAM LASER from hema, on the other hand, the inspection of the weld seam is carried out at the time when the melt has already solidified. As long as the material is liquid, pores, holes and cracks naturally do not yet exist. During the solidification phase, thermomechanical processes still take place in the material such as crystallisation, flow, heat-induced expansion and shrinkage, the behaviour of which is chaotic and unpredictable from the outside. After solidification, holes, cracks and other seam defects are already visible. In addition, a few milliseconds after the end of the energy input by the laser, a distinct glowing is still visible in steel. The intensity and spread of the glowing of the seam can be used as a basis for evaluating the weld seam. This provides access to the primary characteristics of the weld, which actually provide information about the strength and quality.
Extensive series of tests have proved that not only superficial weld defects can be assessed far more reliably, but that it is precisely the measurement of the glowing that reveals the " false friends". Thus the decisive factor for the quality assessment was found.
Higher precision and efficiency in laser welding
